How to Choose a Linear Abrasion Tester
Choosing a Linear Abrasion Tester starts with the material and the question your test must answer. A coated panel, a plastic part, and a printed surface may respond differently to the same abrasive action. Identify the test method, sample dimensions, expected wear pattern, and required reporting before comparing machines. This keeps the selection grounded in your actual work, not a feature list.
Look closely at adjustable load, stroke length, speed, cycle control, and abrasive options. Check whether the fixture holds your sample securely, especially if it is curved, small, or easily marked. A clear control interface helps operators repeat settings, but it cannot replace a documented procedure. Ask how calibration, spare parts, training, and service are handled. These details matter once the tester is in regular use.
Test a representative sample if possible. Watch how the arm travels, how the abrasive contacts the surface, and whether setup changes are straightforward. Review the data and confirm that the instrument supports the relevant test method; do not assume every model meets every standard. That matters. A lower purchase price can be appealing, yet consumables, maintenance, and operator time also shape long-term cost. There is no perfect setup for every surface. Some choices will involve trade-offs, and the first specification you favor may not be the one that best fits your samples. A careful comparison helps you choose a Linear Abrasion Tester that produces useful, repeatable results for your application.
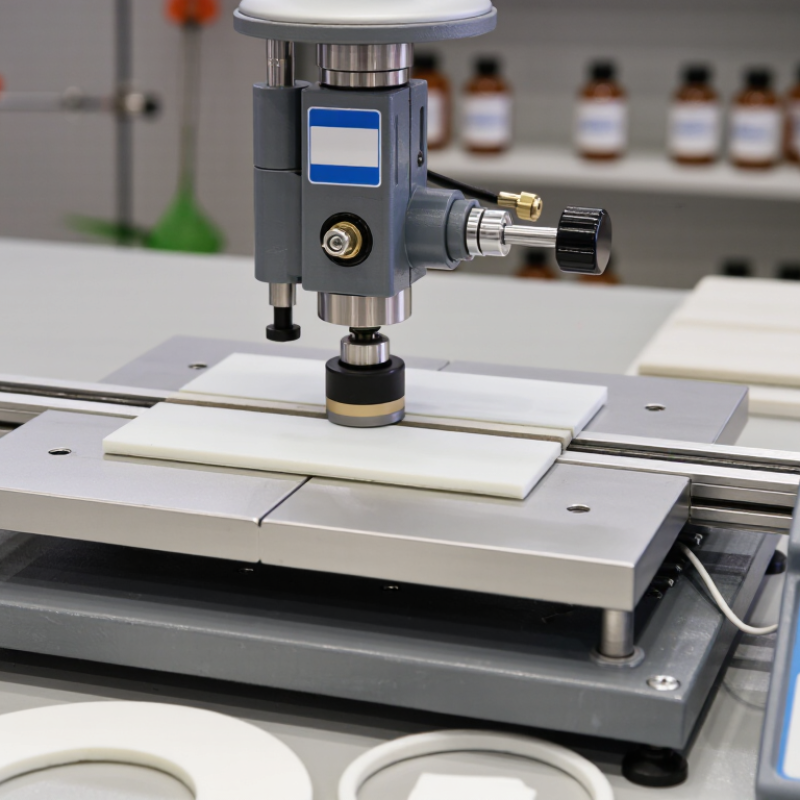
Identify the Material and Wear Conditions to Be Tested
How to Choose a Linear Abrasion Tester
Identify the material and the wear conditions before selecting a tester. A soft textile, painted panel, and molded polymer respond differently to the same abrasive contact. Note the surface finish, thickness, expected load, stroke length, speed, and whether wear is dry or wet. ASTM D4060 uses 500 g and 1,000 g wheel loads for coating abrasion comparisons, but its rotary results cannot be treated as equivalent to linear-test results. For textiles, ISO 12947-2 measures abrasion resistance by recording cycles until breakdown. These methods show why the test endpoint must match the material and real use.
Tips: Use a sample cut from the actual product, including its coating or finish. Set the counterface to match the expected contact, such as a rough fabric, metal edge, or standardized abrasive. Record load, speed, stroke, and environmental conditions. Small changes matter. A test that is too severe may rank materials poorly for the wrong reason; that is easy to overlook. Run replicates, inspect wear tracks, and compare both cycle count and visible damage. Cite the selected method and any deviations in the report so another lab can interpret the results.
Match the Tester’s Motion, Load, and Stroke to the Application
A linear abrasion tester should reproduce the kind of contact your product experiences in use. Choose a motion pattern that reflects the real wear: a short reciprocating path may suit a compact contact area, while a longer stroke can reveal changes across a larger surface. For example, a coated panel may show edge wear if the stroke extends beyond its supported area. Set the load to represent realistic pressure, not simply the tester’s maximum capacity. Small changes matter.
Tips: Check the specimen’s dimensions and fixture before setting the stroke. Keep the contact path consistent, and record the load, stroke length, speed, and number of cycles. These details make results easier to compare between runs.
In practical setup, test a small range of conditions before fixing the method. A heavier load can speed visible damage, but it may create wear unlike normal use. Likewise, an overly long stroke can introduce effects that the application never produces. Inspect the surface at regular intervals, noting scratches, gloss changes, or coating breakthrough. The best setting is not always obvious; revise it when the wear pattern fails to match the real product.
Compare Abrasives, Fixtures, and Specimen Compatibility
A linear abrasion tester is only as useful as the contact it creates. Match the abrasive to the wear mechanism you need to study. A woven pad, fine abrasive sheet, or textured counterface can produce very different marks. Check its grade, surface condition, and replacement interval. Even a small change in abrasive wear can shift results.
Fixtures matter just as much. The holder should keep the specimen flat and prevent movement without crushing soft materials. For a curved plastic part, a shaped support may be more reliable than a flat clamp. Confirm that the fixture allows the intended stroke and load. Watch for edge contact; it can create scratches unrelated to normal use. Small details matter.
Specimen compatibility deserves a practical check before testing. Compare the sample’s thickness, stiffness, coating, and surface shape with the tester’s travel and holder capacity. A thin film may wrinkle, while a coated panel may flex under pressure. Test a spare piece when possible. Look closely at the wear track and note any slippage or debris. The first setup is not always the best one, and that is worth admitting. Record abrasive type, fixture position, load, and stroke length so another operator can repeat the conditions.
Check Test Standards, Controls, and Result Repeatability
A linear abrasion tester should match the method you need to follow, not just the sample you plan to test. Check the relevant test standard and its current edition before comparing equipment. Look for clear requirements on the abrasive material, applied load, stroke length, speed, and number of cycles. Small details matter. A change in pad condition or specimen mounting can alter contact and affect the result.
Controls should make those settings easy to set and verify. Digital displays are useful, but they do not replace calibration records or a documented setup. Ask how the machine checks load and travel, and whether fixtures hold different specimen shapes consistently. Even a carefully written method can leave room for judgment. That is worth noticing. To assess repeatability, run several specimens under the same conditions and compare the results, not just the average. Record the operator, abrasive condition, room temperature, and any interruptions. If results vary widely, investigate setup and conditioning before assuming the material itself is inconsistent. One practical check is to remove and remount a specimen, then repeat the run; small alignment differences may reveal a weak point in your procedure.
How to Choose a Linear Abrasion Tester
Check test standards, controls, and result repeatability.
Calculated sliding distance for 100 complete back-and-forth cycles: distance = 2 × stroke length × cycle count. The stroke lengths are illustrative settings, not requirements from a test standard. Before testing, confirm the applicable standard and specimen setup, and check that the tester controls stroke length, load, speed, and cycle count. Use replicate specimens and compare the spread of results to assess repeatability.
Evaluate Safety, Maintenance, and Long-Term Operating Costs
A linear abrasion tester should protect the operator as well as the test specimen. Check that moving parts are guarded and that the emergency stop is easy to reach. A clear, stable work surface also helps prevent fixtures from shifting during a run. Ask how the machine behaves if a test is interrupted. Small details matter. A safety feature is useful only if operators can understand and use it consistently.
Maintenance affects both test quality and availability. Review how often the drive, guide rails, and stroke settings need inspection. Ask whether routine cleaning requires special tools, and how easily wear parts can be replaced. Abrasive media and specimen fixtures are recurring costs, not minor afterthoughts. Keep a simple maintenance log from the first week. It may reveal patterns that a sales estimate misses. One drawback: estimates of service time can be optimistic, especially when several users share the instrument.
Compare long-term operating costs, not only the purchase price. Include calibration, replacement parts, staff training, power use, and downtime in your estimate. A lower-cost unit may become expensive if repairs take weeks or fixtures are difficult to source. Request a realistic maintenance schedule and confirm what support is available. Then match those details to your expected testing frequency. That adds up.